Get a system setup as a gift, paying for year in advance. The promotion is valid until 2024/09/30 🎁

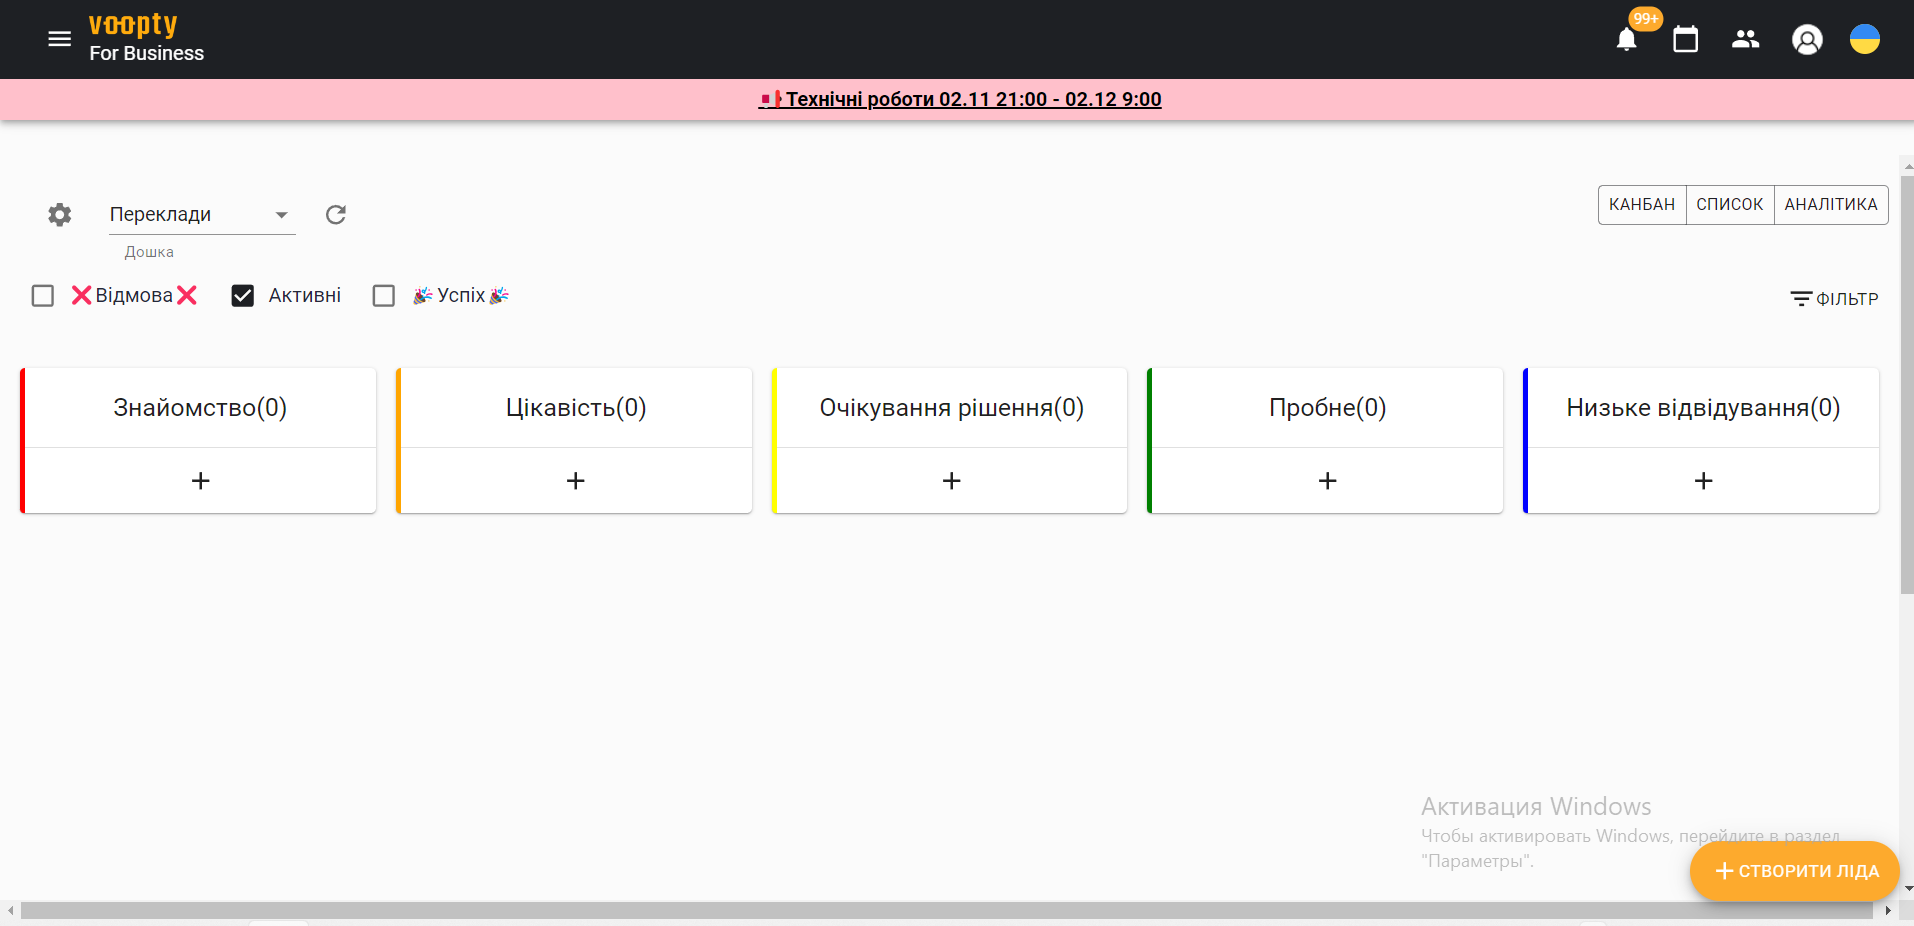
Sales funnel and how to use it

The sales funnel in Voopty is a section of customer acquisition and retention. Today we’re going to tell you how it works.

  1. Click on the “hamburger” in the Customer acquisition and retention section. You can create several sales funnels in the system at the same time. To create an additional one, click on the icon on the top left and Add Board.
  2. To edit an existing board, click on Settings and change all the necessary data: the name of the section, their number.
  3. Later, we can connect the sales funnel with our website. To do this quickly, write to our support team at Woopti. Then all requests from the site will automatically get into the sales funnel.

To add a request manually, you need to click the plus sign in the Requests column and specify all the necessary customer data: Name, branch, tag, employee, and source.

Any request can be moved to another column, for example, Interest, Waiting list, etc. At any step, you can add a comment about the client and set the date. 

It is also possible to set a timer if the client needs to be called back after a certain time.

There are 3 colors in the Customer acquisition and retention section: green, yellow, and red. Here’s what they mean:

Green – it’s time to call.

Yellow – there is still time to call

Red – the call is already overdue 

The system also always has reminders about customers who need to be contacted.

  • снятIn this section, you can see the history of each client, at what stage they were at, and at what stage they are now. 
  • снятThe system has the options Failure and Success, which can be marked according to whether the client continues to cooperate with you. You can mark this in the customer status.

In the left corner, there is a filter where you can view customer analytics. There you can specify a time period and see the number of trial, canceled, and successful customers. The filter also allows you to specify a view by other parameters: employee, source, tags, etc. 

No matter what stage a customer is at, you can always add them to your sales funnel. To do this, go to the customer’s card, click the pencil – Add to sales funnel. Enter all the data and you’re done!

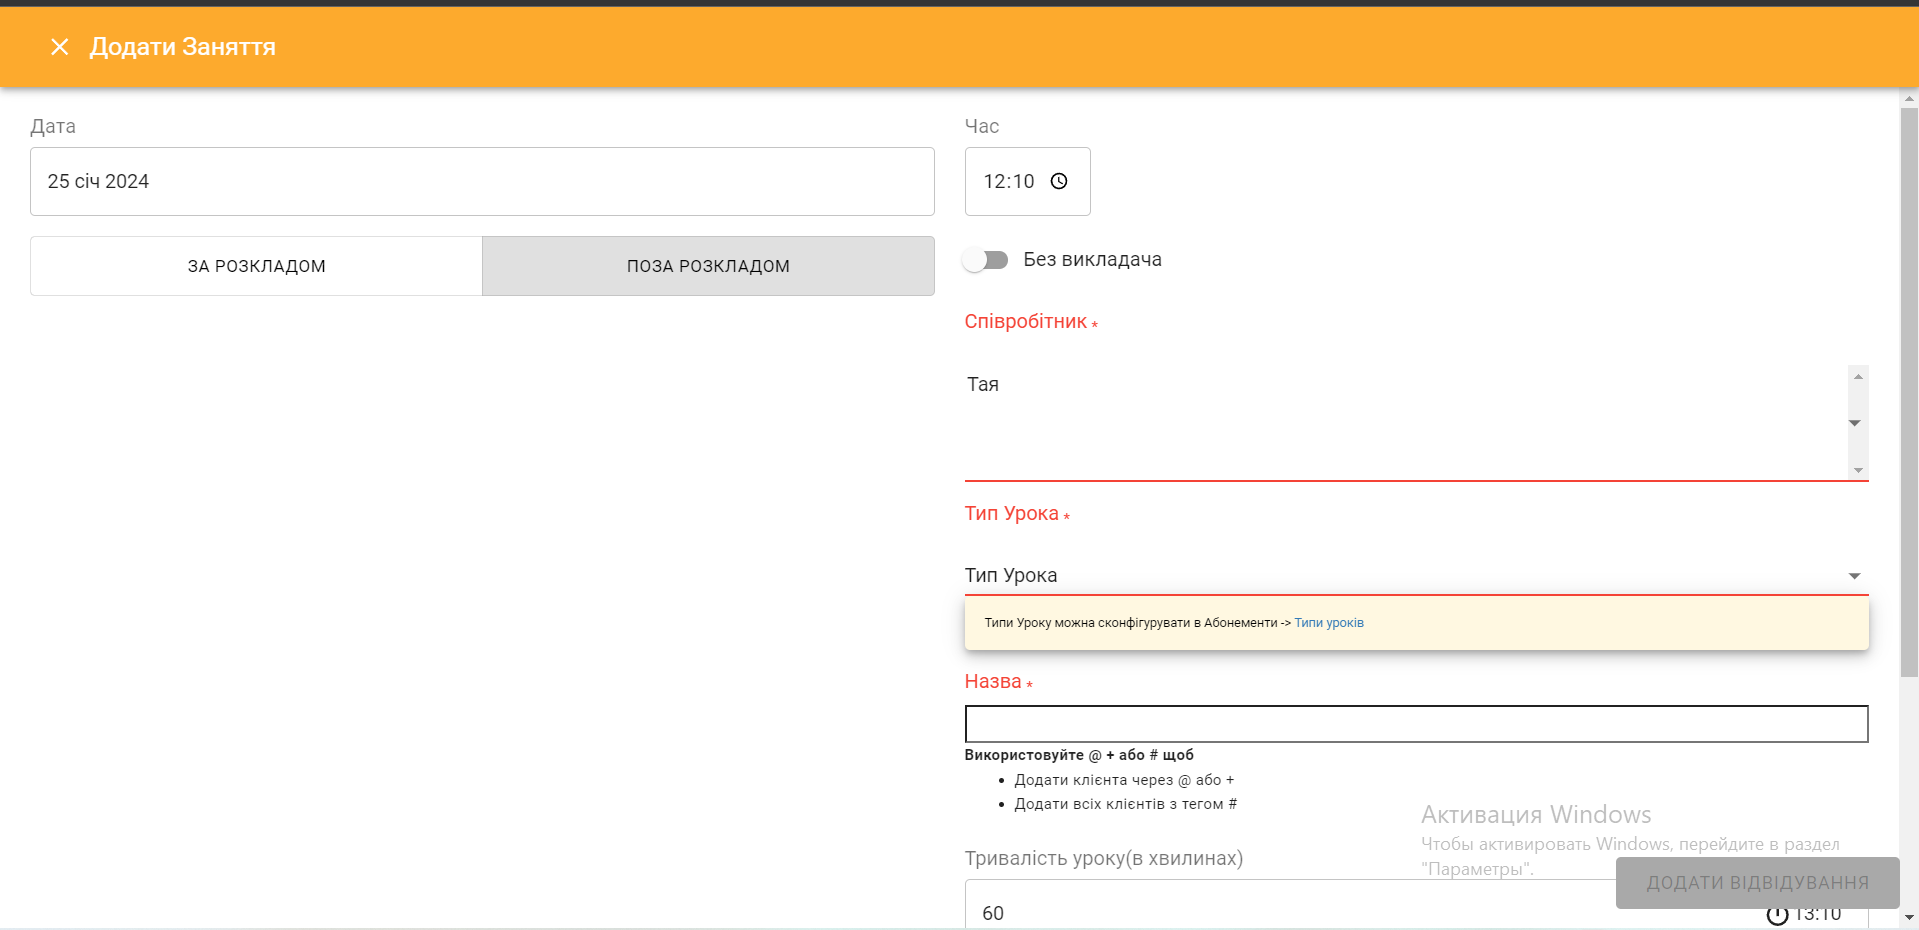
Voopty SRM system: how to work with the schedule

Today we’re going to talk about how to set up a schedule in the Voopty CRM system, add and cancel classes, or add one-time visits to the system. 

  1. How to add a trial lesson or a one-time visit:
  1. Go to the schedule (there is a schedule button on the top panel) and select the necessary field to set the lesson (the schedule shows whether there are other classes at this time and whether the one-time visit intersects with other lessons of the teacher)
  1. Choose the date and time in the settings, select a specific teacher (or two teachers if necessary). Next, select the Lesson type (it depends on the types of lessons you set up earlier in the system, for example, trial lesson or individual English) and the student who will be studying at this time
  1. Change the duration of the lesson if necessary. The duration of the lesson should be set based on the type of lesson you have set up. But if there are some changes, you can also change the duration manually
  1. Click the Add attendance button
  1. Now this lesson has appeared in the schedule

2. How to mark a lesson as held

  1. Go to the schedule, find the required lesson and click on it
  2. Next, click on the button Lesson was held
  3. A window with information about the lesson will appear, where you can leave notes about the lesson
  4. If the lesson is a group mechanics lesson, it is the same, but the teacher has the opportunity to mark which students were present and which were not. You can also choose whether to penalize an absent student. If you do not penalize, the lesson will not be deducted from the subscription
  5. To understand whether the lesson is marked, you should pay attention to the colors – the marked lesson has a deep black inscription, while the unmarked lesson does not.

3. How to cancel a class

  1. Go to the schedule, find the required class and click on it
  2. Next, click on the Cancel class button. It will be crossed out in the schedule
  3. Later, you can go to the information about the lesson (pencil on the left) and specify the reason for cancellation

After canceling, refresh the page and the crossed-out lessons will disappear. To see canceled classes, you should check the Canceled classes filter, and they will all be displayed automatically in the schedule on the page.

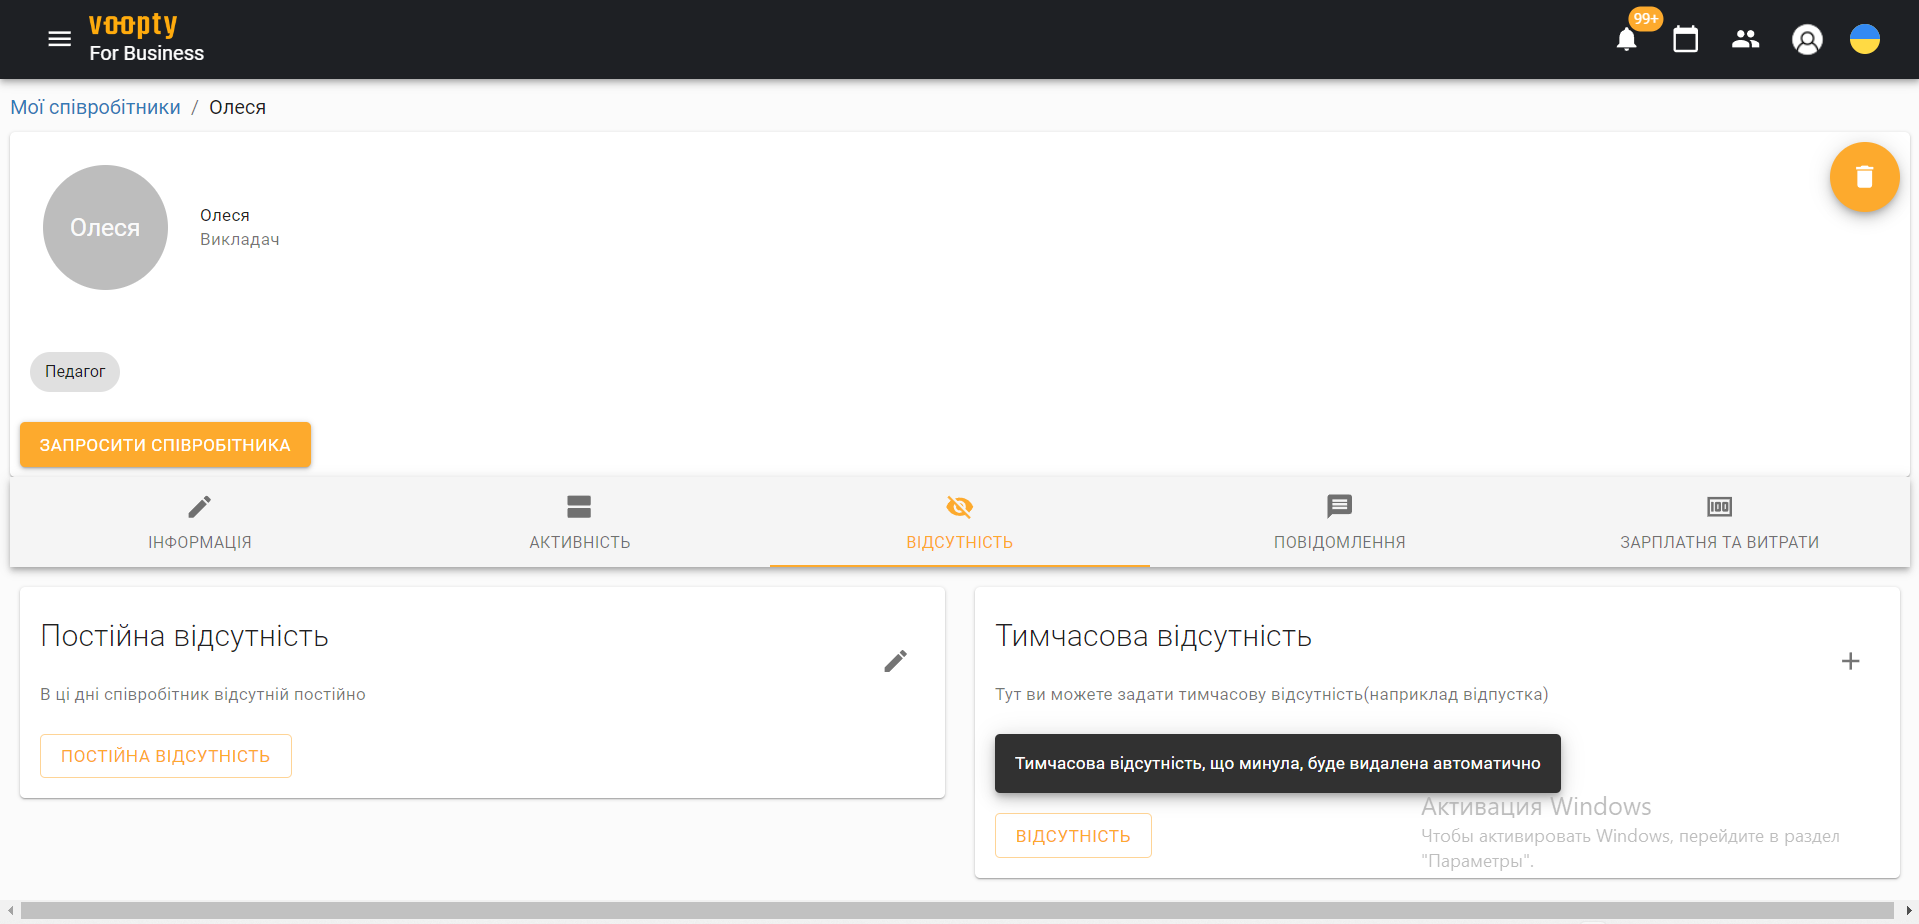
Voopty CRM system: how to mark absence

If an employee takes a short vacation, sick leave, or just a break, it is possible to mark this period in the system. The same function applies to a client who, for example, wants to take a break for a few days, a week, etc. Now we will tell you how to do it.

Absence of an employee (teacher)

  1. Go to the My employees section and select the required employee
  2. Specify the Absence section – 2 possible options Temporary absence (for a certain period) or Permanent absence (means that on specific days and hours the teacher cannot conduct classes on a regular basis). Choose the option you need
  3. In the Permanent absence column, click on the editing pencil and select specific days and hours. Update the employee’s information
  4. To specify a temporary absence, click the button on the right Absence and specify the time period.

Each employee can edit their own absence in their account, and you, as the owner, can edit the absence information for all employees.

To check for updates, go to the schedule, set the filter for a specific teacher, and the journal will display a slash through the time periods when the employee is absent (i.e. when classes cannot be scheduled). 

It is possible to remove an absence in the same section, just click the Delete button.

Client absence

This function is necessary if the client takes a short break for vacations, weekends, or just for a long time. How to put a lesson on freeze:

  1. Go to the My clients section – select the required client
  2. Click on the three dots at the top right – select the Freeze option
  3. In the future, you need to specify specific dates when the client will be absent – click save
  4. Now the client will be absent from the schedule for the specified period

To see the current or previous freezes, they are available in the client’s personal account under the schedule.