Groups and pair classes in Voopty Portal
Groups and pair classes in Voopty Portal
Today we are going to show you how to create group and pair classes. Let’s imagine that you have a group with several people or a pair lesson.
How to reflect this in the system:
1. Go to the Clients section and look for group members
2. Come up with a tag that will group all group members and put it in the Tag column in the client’s personal information (for example, Group1, enter the tag, click Add tag)
3. Do the same in the personal information of each group member – now each member is grouped with one tag
4. Go to the Courses and groups section, create a new course by clicking the “Add course” button
5. Enter all the data of the group: name, type of lesson, description, bind the teacher to the group, adjust the duration, and it is also possible to limit the course by dates
6. Next, select the group tag, specify “Tagged group”, select the tag and clients are immediately connected, save the course
- On the group page, you can set a schedule using the “Add a lesson” button, set the required days and hours, specify the date and time, and that’s it – the course is ready, everything is already displayed in the schedule. You can edit all the information in the same way: go to the course, click Add Lesson, or change the existing schedule.
- When the teacher marks a lesson, a list of group members appears on the page, and the tutor can mark who came to the lesson and who was absent. To do this, click the “Truancy” button and then choose whether to write off the penalty or not, depending on the reason.
- You should also pay attention to the color of the students. Yellow means that the student has not paid for the subscription or the administrator or manager did not have time to make the payment on the page. If the color is green, the subscription is paid.
How to view group lessons analytics:
- Go to the “Beta school journal” section.
- Select a specific group and the required time period for analytics.
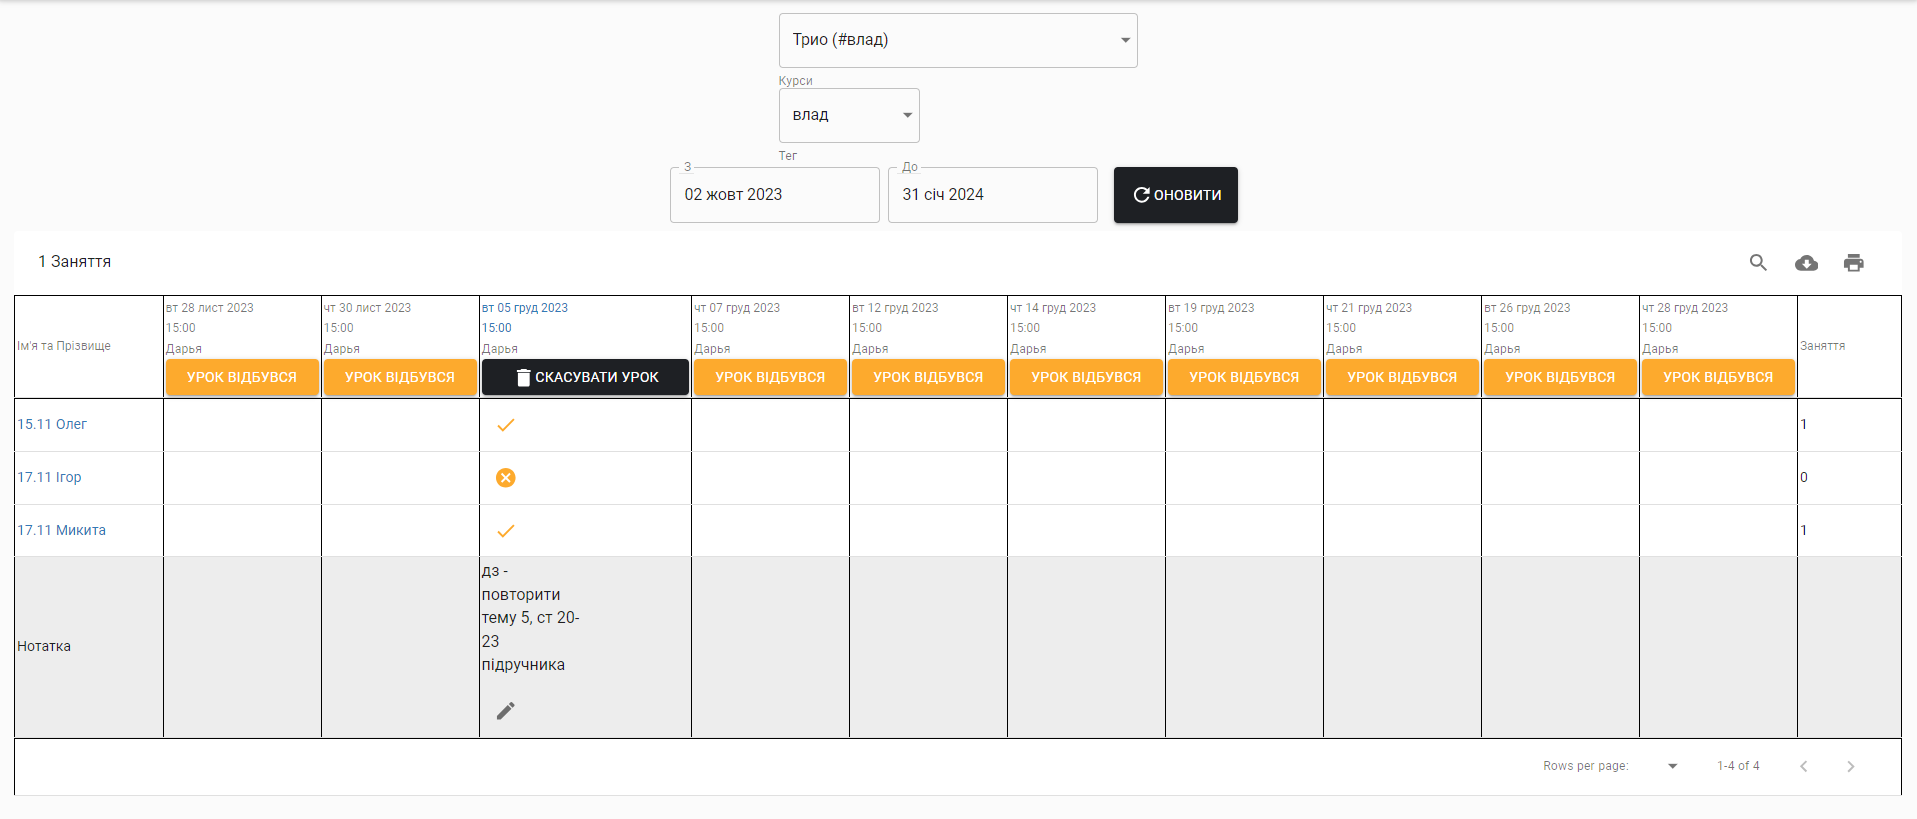
- The system provides a table that shows all the classes that have taken place or have been canceled, as well as the group members who attended them or not. At the end of the table, there is data on which students were most often absent and which attended classes.
After each lesson, the teacher has the opportunity to leave notes with details about the lesson. In the case of a one-time substitution, the other teacher can see the progress, the latest topics, and the specifics of the lesson.
If you have any questions, feel free to contact our support team at Voopty, we are always in touch!

